“`html
Cleaning Thermal Paste Off CPU Pins: A Comprehensive Guide
Cleaning thermal paste from CPU pins is a critical task for any PC enthusiast or technician. This detailed guide will navigate you through the process, ensuring your hardware remains safe and operational. From understanding what thermal paste is to the risks it poses when misapplied, learn how to safely remove it and prevent future mishaps. We’ll also delve into some of the best prebuilt systems currently on the market, providing insights into cutting-edge technologies. Whether you’re here for cleaning tips or to explore the latest in PC gaming, this blog post offers both practical advice and industry insights designed to enrich your tech knowledge.
Understanding the Basics: What is Thermal Paste and Why is it Used?
Thermal paste, a crucial interface material, is used to enhance the heat transfer between a CPU and its heat sink. This compound fills microscopic gaps that air, with its poor thermal conductivity, would otherwise occupy. Effective application of thermal paste ensures the CPU remains cool, consequently maintaining optimal performance and prolonging the life of the processor.
There are various types of thermal pastes available, including ceramic-based, metal-based, and carbon-based variants. Each type offers distinct thermal conductive properties and use cases. The right choice hinges on performance requirements and budget considerations. Applying the correct type and amount of thermal paste is vital to prevent issues such as overheating or damage to sensitive computer components.
The Risks of Thermal Paste on CPU Pins
Electrical Conductivity Issues
One critical risk of thermal paste on CPU pins is its potential for electrical conductivity. Metal-based pastes, in particular, can conduct electricity if they seep onto the CPU pins, causing short circuits. This can lead to irreparable damage to the CPU and other connected hardware components, highlighting the need for a careful and precise application.
Poor Contact and Reduced Performance
Misapplication can result in a poor interface between the CPU and heat sink, reducing thermal conductivity. This leads to higher temperatures and throttled performance, as the CPU cannot efficiently dissipate heat. Ensuring the paste is only on the chip’s surface, not the pins, leads to better all-around stability and functionality.
Difficulty in CPU Removal
Excessive thermal paste can harden between the CPU and the heat sink. This not only complicates the removal of the CPU but also increases the risk of physical damage. It’s crucial to apply a thin, even layer of paste to avoid such complications during future maintenance or upgrades.
Corrosion and Oxidation
Some thermal pastes contain elements that can corrode or oxidize the metal components in CPUs when applied improperly. This is particularly true for metal-based pastes, which, while highly conductive, can cause long-term damage to CPU pins if they come into contact with them, leading to potential hardware failure.
Difficulty in Troubleshooting
When thermal paste spreads to unintended areas, it complicates hardware diagnostics. PC technicians might find it challenging to pinpoint the source of problems, such as boot failures or instability, without first addressing the thermal paste issue. Proper application and immediate cleaning of excess paste are crucial for maintaining easy troubleshooting paths in the event of hardware failure.
Preparation for Removing Thermal Paste
Supplies Needed for the Process
To successfully clean thermal paste off CPU pins, gather the necessary supplies: isopropyl alcohol (preferably 99%), a microfiber cloth, cotton swabs, and a fine-bristle brush. Additionally, having anti-static equipment, such as wrist straps and mats, ensures protection against static electricity, which can damage electronic components.
Safety Measures to Take Before Starting
Always power down and unplug the computer before beginning. Allow the CPU to cool if it’s been recently used. Wear an anti-static wrist strap to avoid any static discharge, which could damage sensitive components. Clear your workspace to avoid accidental spills or contact with other hardware.
Step-by-Step Process of Removing Thermal Paste from CPU Pins
Step 1: Carefully Removing the CPU
Begin by opening your computer case and locating the CPU. Disengage the locking mechanism that holds the CPU or heat sink in place. Carefully lift the CPU out of its socket, avoiding direct contact with the pins to prevent bending or damage.
Step 2: Cleaning Process
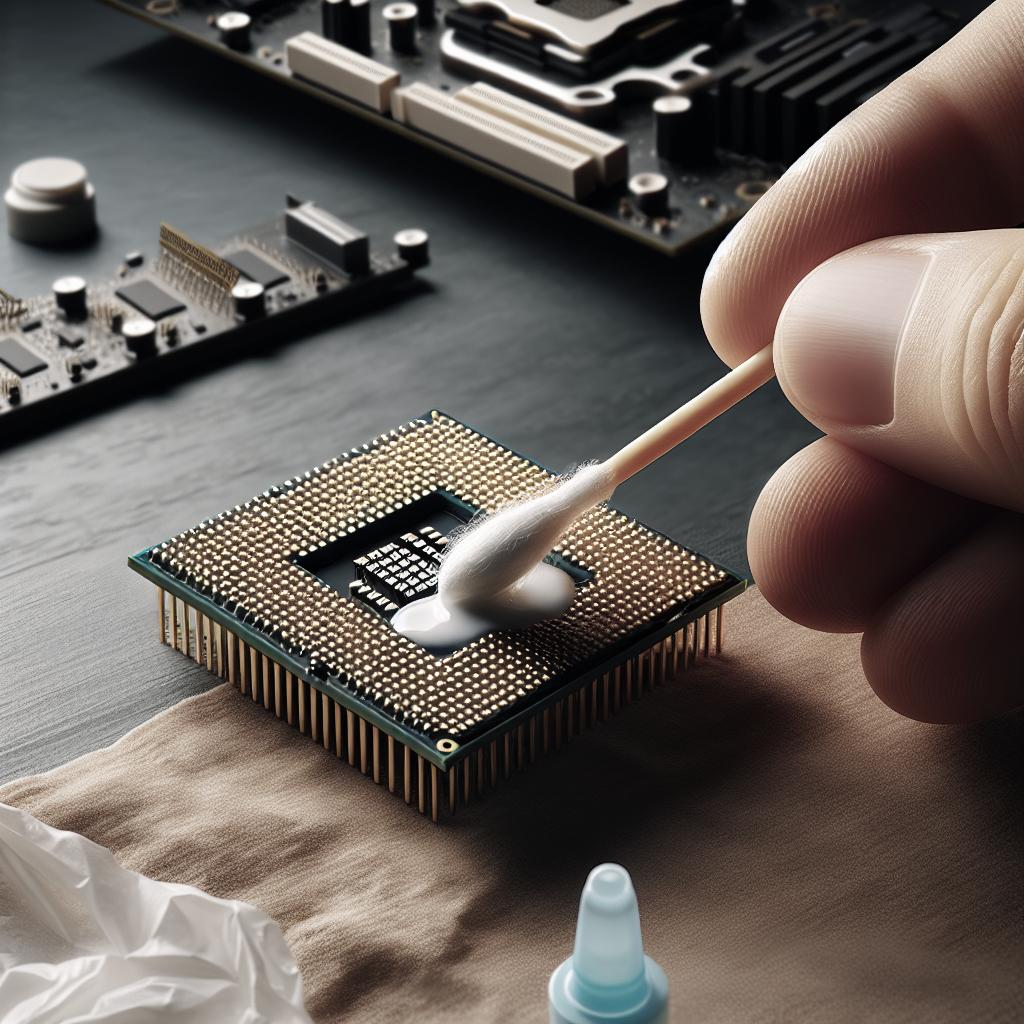
Dip a cotton swab in isopropyl alcohol and gently rub it over the affected CPU pins. Use a fine-bristled brush to reach between the pins, using gentle, even strokes. Work slowly to ensure all paste is removed without bending any pins. Repeat as necessary, using a microfiber cloth to gently wipe any residual paste and alcohol.
Step 3: Testing the CPU Post-cleaning
Once cleaned, position the CPU back into its socket with care, securing it without applying excessive force. Reassemble your computer, reconnect all necessary components, and power it on. Monitor temperatures and system stability to ensure that there have been no adverse effects from the thermal paste cleanup.
Preventing Future Thermal Paste Mishaps
Proper Application of Thermal Paste
Apply a pea-sized dot of thermal paste at the center of the CPU before attaching the heat sink. This amount will spread evenly under pressure, avoiding seepage over the CPU’s edges and onto the pins. Using a quality applicator or a spreader can also help achieve a uniform layer.
Regular Maintenance of Your CPU
Scheduled maintenance helps maintain optimal performance. Every six months to a year, consider cleaning the CPU and inspecting the thermal paste application. Clean the dust from your case and ensure all cooling systems function correctly to prevent overheating and paste degradation.
Signs to Look for if Thermal Paste is Misapplied
Watch for abnormal temperature readings, sudden shutdowns, or start-up failures, which may signal misapplied thermal paste. If you suspect an issue, check the paste status as part of your troubleshooting protocol. This proactive approach can save time and prevent serious hardware issues.
Read Next
For additional insights into CPU maintenance and handling, explore our other guides on proper hardware care and PC building techniques. Staying informed empowers you to handle future issues confidently and efficiently.
Best-Priced RTX 4060 Prebuilt on the Market – Won’t Last Long!
For gaming enthusiasts looking for a powerful prebuilt PC, the RTX 4060 models offer excellent performance at an affordable price. These systems provide seamless gameplay and high-definition graphics, making them a perfect choice for both gamers and content creators.
The market has seen a surge in demand for these competitively priced powerhouses. With features like high refresh rate monitors and ample storage options, these RTX prebuilt configurations provide significant value without compromising quality or speed.
Top Pick: Meet the 1440p Gaming Beast Under $1400
Among the best options in the market today is a 1440p gaming rig that offers incredible value for its price point. This system is equipped with the latest CPU and GPU, ensuring top-level performance in demanding games and applications. It’s optimized for both single and multiplayer experiences.
Alongside raw power, these systems boast sleek designs and customizable RGB lighting, marrying aesthetics and performance. With such impressive specs, this gaming PC stands out as one of the best deals for gamers on a budget, uniting affordability with high-end performance.
Is This the Best Value Prebuilt PC on the Internet Right Now?
If value is your primary concern when shopping for a new PC, this might be the ultimate choice. Balancing cost and performance, this machine offers a robust configuration capable of handling gaming, streaming, and productivity tasks with ease.
Compared to other options within the same price bracket, this prebuilt unit incorporates many premium components found in more expensive systems. It’s the ideal solution for users seeking a reliable system without breaking the bank, offering the best price-to-performance ratio in the market today.
Performance Meets Aesthetics: Inside the Latest Prebuilt from PC Lab LLC
PC Lab LLC’s latest prebuilt brings together cutting-edge performance and eye-catching design. Customizable RGB lighting and an efficient cooling system ensure that this PC not only performs well but looks fantastic while doing so. It’s perfect for users who appreciate when form meets function.
This prebuilt machine stands out with its ease of use and upgradeability. With easily accessible components, users are free to customize their PCs as needed, offering a future-proofed solution that grows and adapts with emerging technologies and user needs.
Final Thoughts
| Section | Summary |
|---|---|
| Understanding the Basics: What is Thermal Paste and Why is it Used? | Explains thermal paste’s role in heat transfer between CPU and heat sink using various types. |
| The Risks of Thermal Paste on CPU Pins | Highlights dangers like conductivity issues, reduced performance, and difficulties in removal. |
| Preparation for Removing Thermal Paste | Details necessary supplies and precautionary measures before cleaning. |
| Step-by-Step Process of Removing Thermal Paste from CPU Pins | Guides through CPU removal, cleaning, and post-cleaning testing procedures. |
| Preventing Future Thermal Paste Mishaps | Covers correct paste application, maintenance, and troubleshooting indicators. |
| Tech Insights | Showcases top prebuilt gaming PCs with specs, affordability, and performance highlights. |
“`

